
Smoke Testing vs Sanity Testing: Practical Differences for Real QA Work
 10 MIN
 25 Jan 2026
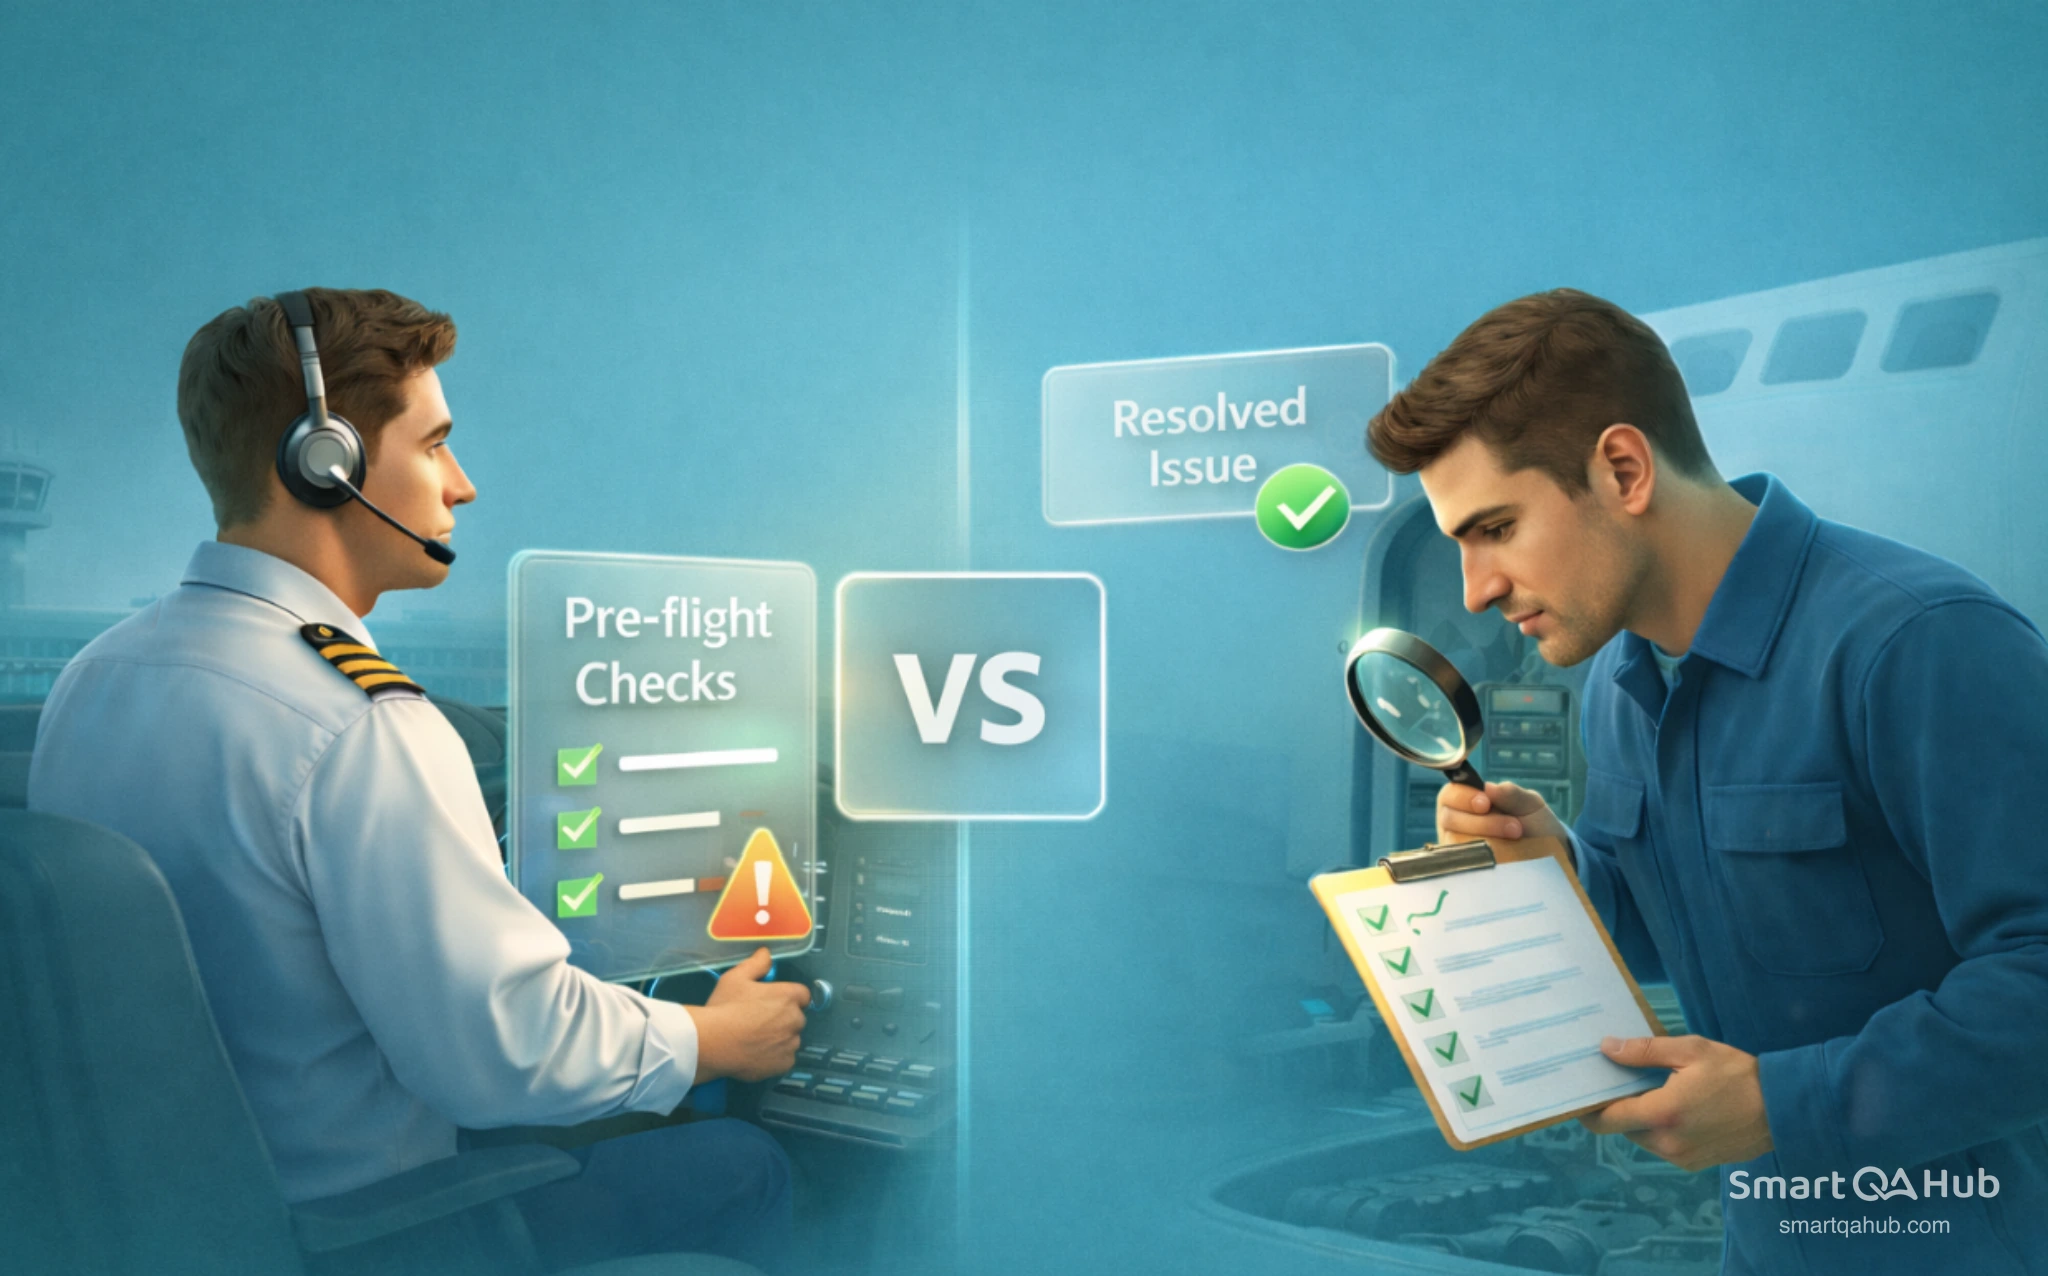
Smoke testing vs sanity testing confuses many junior testers, yet understanding the difference can save hours of wasted effort. Both check if software works, but they serve distinct purposes at different stages of development. Smoke testing answers “does the build run at all?” while sanity testing asks “does this specific fix actually work?” This guide breaks down when and why you would use each approach, complete with real-world examples you can apply to your first testing projects.
Table of content
What are smoke and sanity testing?
Picture this: you’ve just bought a used car. Before planning any road trips, you’d probably check if it starts, if the engine sounds okay, and if the basic controls work. That’s essentially smoke testing – a quick check that the fundamental stuff functions before investing more time.
Now imagine you took that car to a mechanic because the brakes felt spongy. When you pick it up, you’re not going to re-check the entire vehicle. You’ll test the brakes specifically – maybe a few stops at different speeds. That’s sanity testing: verifying that a specific fix actually solved the problem.
Both smoke and sanity testing fall under the umbrella of software testing, but they answer different questions at different moments in the software development cycle. Understanding when to use each one helps you work more efficiently and catch problems at the right time.
Smoke testing explained
Smoke testing is a quick, broad verification that a software build’s critical functions work at a basic level. Think of it as the “does it turn on?” test before anything else happens.
The term comes from the hardware testing process – engineers would plug in a new circuit board and watch to see if it literally started smoking. If it did, no point testing anything else. In software, we’re checking whether the software application is stable enough to warrant further testing.
You might also hear smoke testing called build verification testing (BVT) or confidence testing. Regardless of the name, the goal remains the same: catch major failures early before wasting time on detailed testing.
Here’s what smoke testing might look like for an e-commerce application:
- Can users log in?
- Does the homepage load without errors?
- Does the search function return results?
- Can items be added to the shopping cart?
- Is the checkout page accessible?
Notice how these checks are shallow – you’re not testing every login scenario or search filter. You’re confirming the major pathways exist and respond. If any fail, the build gets rejected immediately. No point testing coupon codes if users can’t reach the checkout page.
Smoke tests typically take 15 to 30 minutes and cover core functionality. Many teams automate them so they run whenever a new build is deployed. This automated testing means problems get caught within minutes of deployment, saving everyone time and frustration.
Sanity testing explained
Sanity testing is a focused, narrow check that verifies specific changes or bug fixes work as intended. Where smoke testing asks “does the whole thing run?”, sanity testing asks “does this particular thing we just changed actually work?”
The name comes from the idea of a “sanity check” – making sure something is rational and logical before proceeding. When a developer says “I fixed the discount code bug,” a sanity test confirms that fix makes sense before spending hours on full regression testing.
Sanity testing is sometimes called narrow regression testing or surface level testing. It’s a subset of regression testing, but much more targeted. You’re not checking everything – just the specific area that changed and its immediate neighbors.
Using our e-commerce example, imagine developers fixed a bug where discount codes weren’t applying correctly. A sanity test would focus specifically on discount functionality:
- Does a valid percentage discount code work?
- Does a fixed-amount discount code work?
- Does an expired code get properly rejected?
- Does the discount appear correctly in the order summary?
You’re not re-testing login or search – those weren’t touched. You’re zeroing in on the specific area that changed. Sanity tests usually take 30 to 60 minutes depending on the scope of changes, and they’re typically performed manually without formal test documentation.
The key difference between smoke testing and sanity testing
Let’s put sanity testing vs smoke testing side by side. The differences become clearer when you compare them across several dimensions.
Purpose and what each answers
Smoke testing answers: “Is this build stable enough to invest more testing time?”
Sanity testing answers: “Did this specific change or fix work without breaking related features?”
The difference in purpose shapes everything else about how these tests work. Smoke testing is about overall viability – can we even use this build? Sanity testing is about specific verification – did the work we just completed actually succeed?
When each happens in the testing cycle
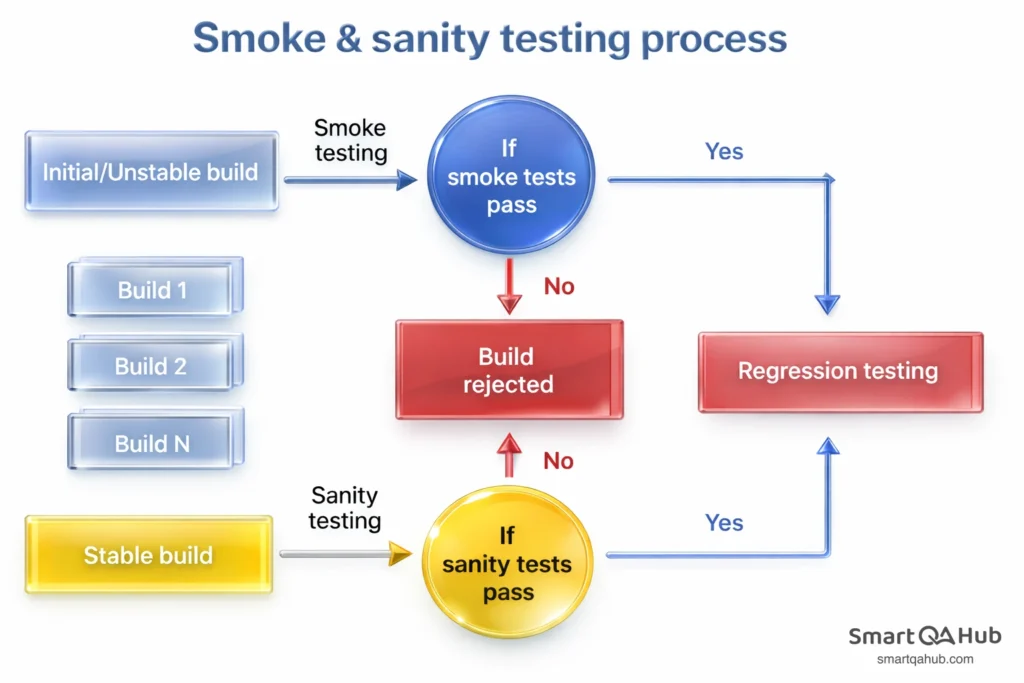
Timing matters a lot here. Smoke testing happens first, immediately after a new build arrives from development. It’s the gatekeeper deciding whether further testing should proceed.
Sanity testing comes later, after specific bug fixes have been made to an already-stable build. It happens before committing to full regression testing, which would take significantly more time.
Think of sanity and smoke testing sequentially: new build arrives → smoke test → development continues → bug fixes applied → sanity test each fix → full regression testing → release.
Scope and depth
Smoke testing is wide but shallow. You’re touching many features but only at a surface level. The goal is breadth, not depth.
Sanity testing is narrow but slightly deeper. You’re examining one specific area more thoroughly than a smoke test would, but not going as deep as full regression.
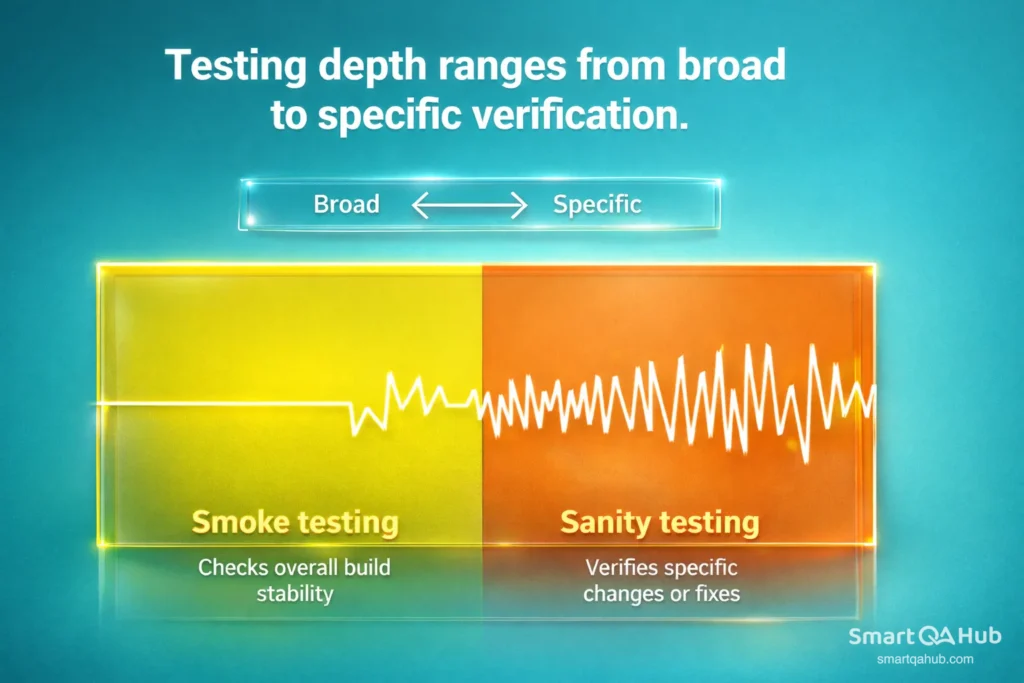
Here’s a practical way to think about it: smoke testing might check that all ten major features of your app respond. Sanity testing might check that one feature works correctly across five different scenarios.
Smoke test vs sanity test difference: Who typically runs them
Smoke tests are often run by developers, testers, or automated systems. Because they’re standardized and repeatable, they fit naturally into CI/CD pipelines where they execute automatically after every deployment.
Sanity tests are usually run by testers, often manually. Because sanity testing responds to specific changes that vary each time, it’s harder to automate comprehensively. The tester needs to understand what changed and design appropriate checks accordingly.
Key differences between smoke and sanity testing
| Aspect | Smoke testing | Sanity testing |
|---|---|---|
| Purpose | Verify the build runs and critical features work | Verify specific bug fixes or changes work correctly |
| When performed | Immediately after a new build arrives | After smoke testing passes, when fixes are applied |
| Scope | Broad but shallow – covers all critical paths | Narrow but deeper – focuses on changed areas only |
| Who performs it | Developers, testers, or automated systems | Testers with knowledge of the specific changes |
| Documentation | Structured, pre-defined test cases | Ad-hoc, based on what changed |
| Automation | Often automated in CI/CD pipelines | Usually manual due to varying scope |
| Time required | 15–30 minutes | 30–60 minutes |
| If it fails | Build rejected, blocks all testing | Specific fix returned to development |
Smoke vs sanity testing in software testing with examples
Let’s see both tests in action using a fictional e-commerce app “ShopEasy.”
Smoke test example: New software build arrives. In 20 minutes, you verify: homepage loads, login works, search returns results, cart accepts items, checkout page displays. All pass – build is stable for further testing. If the checkout threw a 500 error, you’d reject the build immediately.
Sanity test example: Developer fixes bug #1247 (discount codes over 25% failing). In 45 minutes, you verify: 30% code works (the broken scenario), other percentages calculate correctly, expired codes get rejected, order totals update properly. Fix confirmed — ready for full regression.
How to decide which test to use
When you’re new to testing, deciding between a smoke test and a sanity test can feel uncertain.
Here’s a simple decision framework:
Run a smoke test when:
- A completely new build just arrived
- You’re seeing the application for the first time that day
- Major changes were deployed (new features, big updates)
- You need to decide if further testing is worth the time
Run a sanity test when:
- A specific bug was reported as fixed
- A particular feature was modified
- You need quick verification before full regression
- Time constraints prevent comprehensive testing
The key question to ask yourself: Am I checking overall stability, or verifying a specific change?
Overall stability → smoke test. Specific change → sanity test.
Tip: A helpful mental model: smoke testing is like checking that all rooms in a house have working lights. Sanity testing is like checking that the one lightbulb you just replaced actually turns on. Same house, different purpose.
What if you’re unsure? Default to smoke testing first. You need to know the build is stable before sanity testing individual fixes makes sense. Running sanity tests on an unstable software build wastes time – that discount code fix won’t matter if users can’t log in.
Sanity testing vs smoke testing in your workflow
Understanding the concepts is one thing. Integrating them into your daily work is another. Here’s practical guidance for making both types of testing part of your routine.
Creating a simple smoke test checklist
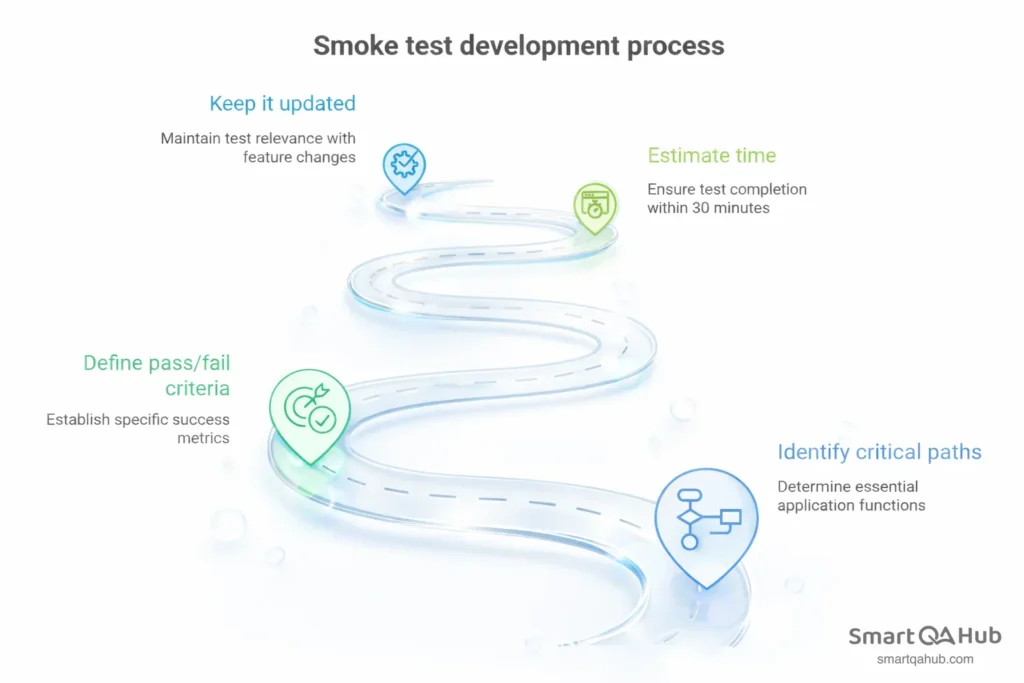
Your smoke test should be documented, repeatable, and quick. Here’s how to build one:
- Step 1: Identify critical paths. What are the 5 to 10 things your application absolutely must do? For most software applications, this includes authentication, core navigation, primary features, and key transactions.
- Step 2: Define pass/fail criteria. For each critical path, what does “working” look like? Be specific. “Login works” is vague. “User can log in with valid credentials and sees dashboard within 5 seconds” is testable.
- Step 3: Estimate time. Your smoke test should complete in 15 to 30 minutes. If it takes longer, you’ve included too much.
- Step 4: Keep it updated. When major features change, update your smoke test.
Example checklist:
| Critical path | Expected result |
|---|---|
| Homepage loads | All major elements visible, < 3 sec |
| User login | Valid credentials accepted, dashboard displays |
| Product search | Results appear for valid query |
| Add to cart | Item appears in cart, count updates |
| Checkout page | Page loads, payment options visible |
| User logout | Session ends, redirects to homepage |
Effective sanity testing habits
Sanity testing is less about checklists and more about smart, focused verification. Build these habits:
- Get clear on what changed. Before testing, read the bug ticket or change the description. Talk to the developer if needed. You can’t verify a fix you don’t understand.
- Test the fix plus immediate neighbors. If discount calculation was fixed, test discount codes thoroughly. Also check closely related functionality – order totals, price displays. Don’t test unrelated features.
- Know when to stop. Once you’ve verified the specific change works and hasn’t broken neighboring features, you’re done. Full coverage is regression testing’s job.
- Communicate results quickly. The point of sanity testing is fast feedback. Don’t sit on results – if the fix works, say so immediately. If it doesn’t, report it with clear reproduction steps.
- Trust your instincts. If something feels off during sanity testing – even outside the official scope – make a note. You might be catching an unexpected side effect.
Alternative terminology to know:
- Build verification testing (BVT) = smoke testing
- Confidence testing = smoke testing
- Intake testing = smoke testing
- Narrow regression testing = sanity testing
- Surface level testing = sanity testing
FAQ: Frequently asked questions about sanity testing and smoke testing
Can sanity and smoke testing be automated?
Which test should I do first?
Do I need formal test cases for sanity type of testing?
Is sanity testing the same as regression testing?
What happens if a smoke test fails?
What happens if a sanity test fails?
Apply what you’ve learned
Smoke testing vs sanity testing represents a fundamental distinction in software testing. Smoke testing provides a wide, shallow check of overall build stability – answering “does this application run at all?” Sanity testing offers a narrow, focused verification of specific changes – answering “does this particular fix actually work?” Use smoke testing after every new build arrives. Use sanity testing after bug fixes.
The practical difference matters most: smoke testing is your first line of defense against broken builds, while sanity testing is your quick verification that specific work was completed successfully. Together, they create an efficient workflow that catches problems early and verifies solutions quickly. Master both, and you’ll test smarter from day one.
Create a simple smoke test checklist for your current project. Identify five to seven critical paths, document what “working” looks like for each, and run it after the next build. You’ll immediately see how valuable this quick verification becomes.


