
UI Testing: Why Broken Buttons Still Reach Users
 18 MIN
 15 Jan 2026
UI testing is how you make sure users can actually use your software without frustration. It checks that buttons click, forms submit, and everything on screen works exactly as designed. Whether you’re testing a mobile app or a complex web platform, UI testing catches the problems that other testing types miss.
Table of content
This guide covers the essentials – from understanding what is UI testing to choosing the right UI testing frameworks for your first project. We’ll look at different UI testing types, when automation makes sense, and the mistakes that trip up beginners. Ready to see your applications through your users’ eyes?
What is UI testing (and why should you care)?
Picture this: you’ve just found the perfect item online, added it to your cart, and clicked “Checkout.” Nothing happens. You click again. Still nothing. Frustrated, you abandon the purchase and try a competitor’s site instead. That broken button? UI testing would have caught it.
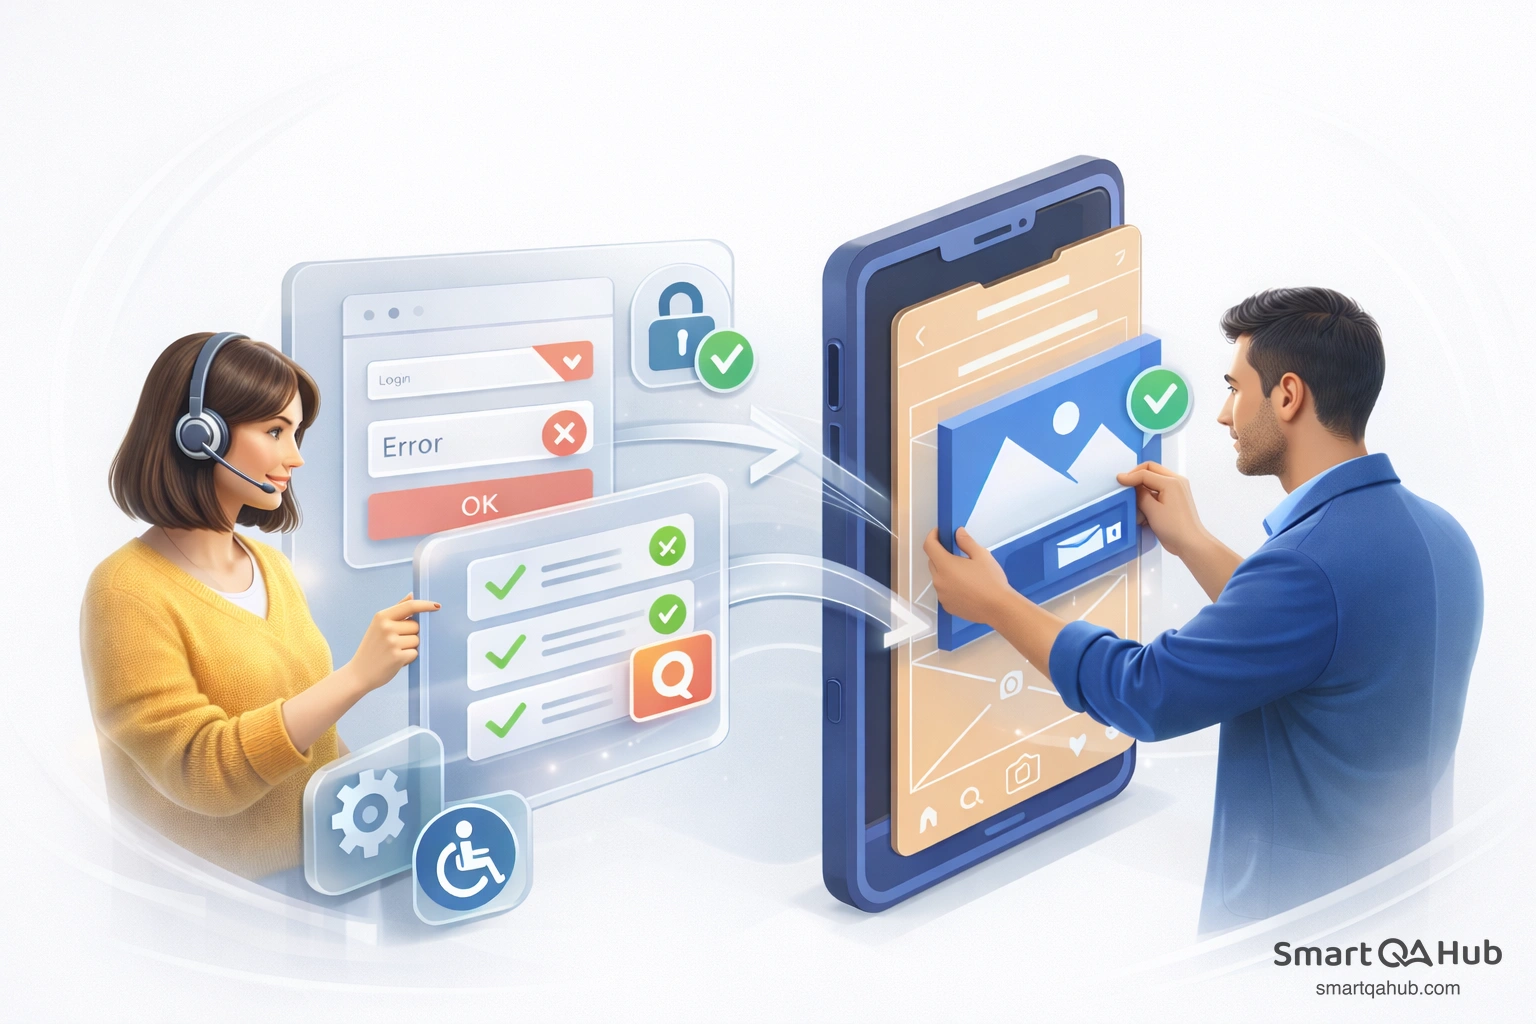
UI testing – short for user interface testing – is the testing process of verifying that all the visual and interactive elements of an application work correctly. Every button, menu, form field, dropdown, link, and icon that users interact with falls under the UI testing umbrella. The goal is simple: make sure that what users see on screen actually does what it’s supposed to do.
But testing UI goes beyond just checking if buttons work. It’s about validating the entire experience from the user’s perspective.
User interface testing is about the user, not just the interface
Does the login form accept valid credentials and reject invalid ones?
Does the navigation menu expand when clicked?
Do error messages appear when users submit incomplete forms?
Does the interface behave consistently whether someone’s using Chrome on a laptop or Safari on a phone?
Here’s why this matters for your career as a tester: the user interface is where your application meets reality. Behind the scenes, the code might be flawless. The database might store everything perfectly. The API might respond in milliseconds. But if users can’t actually interact with the interface to access all that functionality, none of it matters.
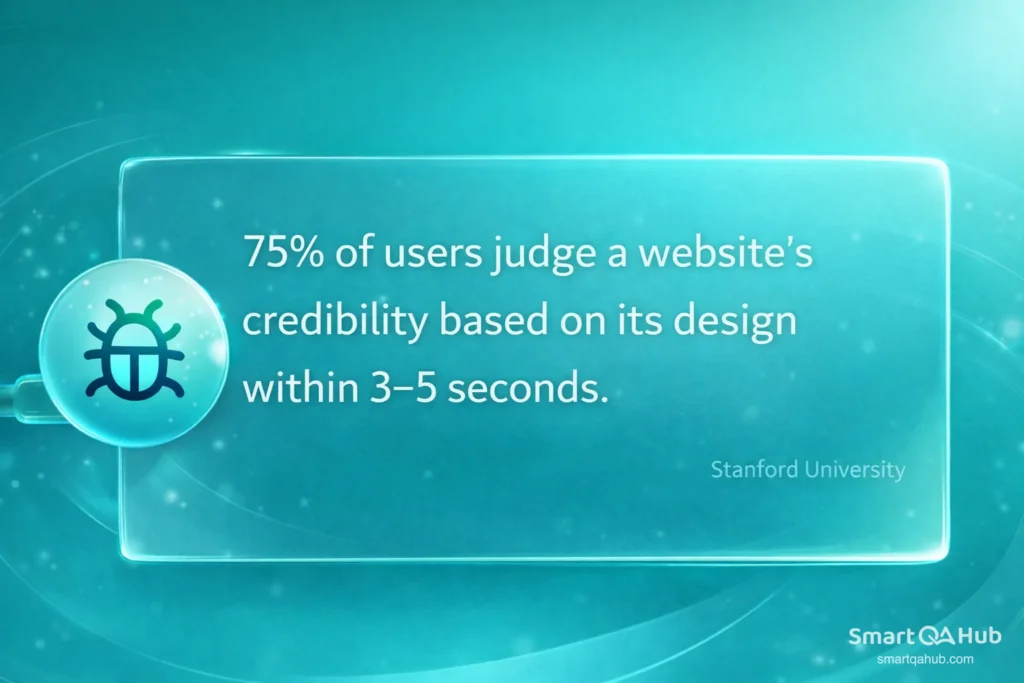
The consequences of skipping UI testing are real and measurable. Users abandon applications that frustrate them. Support tickets pile up for issues that should have been caught before release. Brand reputation suffers when people encounter buggy interfaces. And fixing UI problems after launch costs significantly more than catching them during testing.
For junior testers, UI testing is often where you’ll start your career – and for good reason. It builds foundational skills in test case design, defect reporting, and understanding user behavior. The concepts you learn here apply to virtually every other type of testing you’ll encounter.
UI testing vs GUI testing: Clearing up the confusion
If you’ve been researching this topic, you’ve probably noticed that “UI testing” and “GUI testing” are often used interchangeably. Sometimes you’ll see “UI/UX testing” thrown into the mix as well. So what’s the actual difference?
Let’s start with GUI testing. GUI stands for Graphical User Interface – essentially, any interface that uses visual elements like windows, icons, buttons, and menus rather than just text commands. GUI testing focuses specifically on these graphical elements: verifying that they appear correctly, are positioned properly, display the right colors and fonts, and respond appropriately to user actions.
UI testing is technically a broader term. While GUI testing zooms in on the graphical and visual aspects, UI testing encompasses both the visual elements and the underlying behavior of the interface. It asks not just “does this button look right?” but also “when I click this button, does the correct action happen?”
The difference matters less than you might think
In practice, though? Most people use these terms to mean the same thing. When your team lead asks you to do “UI testing” or “GUI testing,” they’re almost certainly asking you to verify that the interface works correctly for users. Don’t get too caught up in terminology debates.
Where UX/UI testing fits in is a bit different. UX (user experience) testing is less about whether things work and more about whether they work well for users. It asks questions like: Is the interface intuitive? Can users accomplish their goals efficiently? Is the navigation logical? UX testing often involves watching real users interact with the application and gathering feedback about their experience.
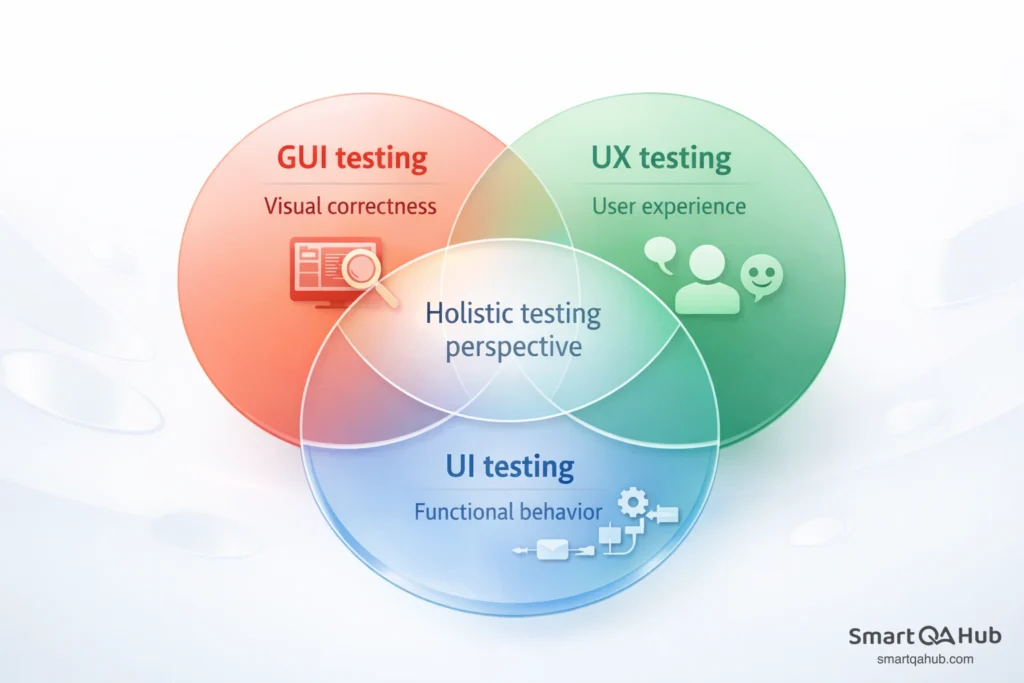
The relationship looks something like this: GUI testing checks that visual elements display correctly, UI testing verifies that the interface functions as designed, and UX testing evaluates whether the overall experience meets user needs. In reality, these overlap significantly, and a thorough tester considers all three perspectives.
For your day-to-day work as a beginner, here’s the practical takeaway: focus on what you’re actually checking rather than what to call it. Are you verifying that elements look right? That they function correctly? That users can accomplish tasks? All of this falls under the broad umbrella of testing the user interface.
Types of UI testing you’ll encounter
Not all UI testing looks the same. Depending on what you’re checking and why, you’ll use different approaches. Here’s an overview of the main types you’ll work with as a tester.
Functional testing of UI elements
This is the bread and butter of UI testing. Functional UI testing verifies that interactive elements do what they’re supposed to do. Click a button – does the expected action occur? Fill out a form and submit it – does the data get processed correctly? Select an option from a dropdown – does the interface respond appropriately?
You’re essentially validating that the interface correctly connects user actions to system responses. When a user clicks “Add to Cart,” the item should appear in their cart. When they enter a search term and hit enter, relevant results should display. Each interactive element has an expected behavior, and functional testing confirms that behavior works.
Visual and layout testing
While functional testing asks “does it work?”, visual testing asks “does it look right?” This type of UI testing checks the appearance of the interface: colors match the design specifications, fonts are correct, elements are properly aligned, spacing is consistent, and images display without distortion.
Visual testing matters more than you might think. Inconsistent visuals undermine user trust. If buttons look different on different pages, or if text overlaps with other elements, users notice – even if they can’t articulate what’s wrong. They just know something feels off.
This type of testing becomes especially important when applications support multiple themes (like dark mode) or when designs are updated. A change in one place shouldn’t accidentally break the visual consistency elsewhere.
Usability testing through the UI
Usability testing evaluates whether users can actually accomplish their goals using the interface. It’s less about whether individual elements work and more about whether the overall flow makes sense. Can a new user figure out how to complete a purchase? Is the registration process straightforward? Are error messages helpful or confusing?
While formal usability testing often involves observing real users, testers can apply usability thinking to their UI testing. As you test, ask yourself: would a real user find this confusing? Is it obvious what to do next? Are there unnecessary steps that could frustrate people?
Cross-browser and cross-device testing
Users access applications through an enormous variety of browsers and devices. Chrome, Firefox, Safari, Edge. Windows, macOS, iOS, Android. Laptops, tablets, phones of every screen size imaginable. Cross-browser and cross-device testing verifies that the UI works consistently across this fragmented landscape.
An interface that looks perfect in Chrome might have layout issues in Safari. A button that’s easy to tap on a large phone screen might be frustratingly small on an older device. Forms that work on desktop might be awkward to complete on mobile. This type of testing catches these environment-specific issues.
In 2025, with the continued growth of mobile usage and the sheer number of browser versions in active use, cross-browser and cross-device testing is more important than ever for delivering quality user experiences.
Manual vs automated UI testing: When to use each
One of the first questions you’ll encounter in UI testing is whether to test manually or use automated testing. The honest answer? Both approaches have their place, and most effective testing strategies combine them.
Manual UI testing means a human tester interacting with the interface directly – clicking buttons, filling out forms, navigating through screens, and observing what happens. It’s hands-on, flexible, and requires no special tooling beyond access to the application.
Automated UI testing uses scripts and tools to simulate user interactions automatically. Once set up, automated tests can run repeatedly without human intervention, checking the same elements and flows every time.
Here’s when manual testing shines
Exploratory testing – When you’re getting to know a new feature or application, manual testing lets you poke around, follow your instincts, and discover issues that scripted tests would miss. You might notice that something feels awkward even if it technically works.
Evaluating new features – Before investing time in automation, manual testing helps you understand what needs testing and how the feature behaves. Writing automated tests for something you don’t fully understand yet leads to poor test coverage.
Usability assessment – Automation can tell you if a button works, but it can’t tell you if users will find it confusing. Human judgment is essential for evaluating the actual user experience.
One-off testing – If you’re only going to run a test once or twice, the time spent writing an automation script isn’t worth it.
And here’s when automation testing makes sense
Regression testing – When you need to verify that existing functionality still works after code changes, automated tests can run through hundreds of checks quickly. Running this manually every time would be tedious and error-prone.
Repetitive checks – Login flows, form submissions, navigation paths – tests you’ll run over and over again are prime candidates for automation.
Cross-browser testing – Manually testing the same flows across multiple browsers and devices is time-consuming. Automation tools can run parallel tests across different environments simultaneously.
Data-driven testing – When you need to test the same functionality with many different inputs (different user types, various data combinations), automation handles the repetition efficiently.
The reality is that automation isn’t a replacement for manual testing – it’s a complement to it. Manual testing provides insight, flexibility, and human judgment. Automation provides speed, consistency, and scalability. Smart teams use both.
Pro tip: Start with manual testing to understand what you’re checking, then consider automation for tests you’ll run repeatedly.
For beginners, focus on building solid manual testing skills first. Understanding what makes a good test, how to design test cases, and how to think like a user will serve you well whether you’re testing manually or writing automated scripts. Automation skills can come later, built on that foundation.
Essential UI testing tools for beginners
The UI testing frameworks landscape can feel overwhelming when you’re starting out. There are dozens of options, each with different strengths, learning curves, and use cases. Here’s a practical overview focused on what you’re likely to encounter.
Browser-based and web testing tools
For web applications, these are the tools you’ll hear about most often:
Selenium is the industry standard for web UI test automation. It’s open-source, supports multiple programming languages (Java, Python, JavaScript, C#), and works with all major browsers. The catch? Selenium requires coding knowledge. You’ll need to write scripts to create your tests, which makes the learning curve steeper for non-developers. However, Selenium skills are highly valued in the job market, so investing time here pays off.
Cypress has gained significant popularity as a more developer-friendly alternative. It’s JavaScript-based, runs directly in the browser, and offers a more intuitive experience for writing and debugging tests. Cypress excels at testing modern web applications and provides excellent documentation for learners. If you’re comfortable with JavaScript or willing to learn, Cypress is a solid choice.
Source: https://www.cypress.io/app#browser_testing
Playwright is a newer tool from Microsoft that supports multiple browsers (Chrome, Firefox, Safari) with a single API. It’s known for reliability and handles modern web features well. Like Selenium and Cypress, it requires coding, but its growing community and strong documentation make it accessible for motivated beginners.
GUI testing tools for desktop applications
If you’re testing desktop applications rather than web apps, you’ll encounter different tools:
Ranorex and TestComplete are commercial tools that support testing Windows desktop applications, along with web and mobile. They offer both recorded tests (where you perform actions and the tool captures them) and scripted tests. These tools are common in enterprise environments.
For beginners working with desktop applications, the good news is that many concepts transfer from web UI testing. The elements are different (Windows controls instead of HTML elements), but the approach – identifying elements, performing actions, verifying results – remains similar.
Mobile UI testing tools
Mobile app testing has its own ecosystem:
- Appium is the most widely used open-source tool for mobile UI testing. It works with both iOS and Android applications and uses the same WebDriver protocol as Selenium, so skills transfer between them.
- Espresso (for Android) and XCUITest (for iOS) are platform-specific tools created by Google and Apple respectively. They’re fast and reliable but only work for their specific platforms.
You’ll typically encounter mobile testing tools if you’re working at a company with mobile apps. If you’re just starting out, web testing tools are more commonly needed.
No-code and low-code options
Not ready to write code yet? Several tools let you create UI tests without programming:
- Katalon Studio offers a free version with a visual interface for creating tests. You can record interactions and build test cases without writing code, though coding options exist for more advanced needs.
- testRigor uses plain English commands to create tests – you describe what you want to test in natural language, and the tool handles the technical implementation.
These tools can be a good starting point for learning UI testing concepts without the barrier of coding. However, be aware that most employers expect testers to develop at least basic scripting skills over time.
UI testing best practices: A practical workflow
Knowing the concepts is one thing. Actually doing UI testing is another. Here’s a practical workflow you can apply to your testing work.
Understanding what to test
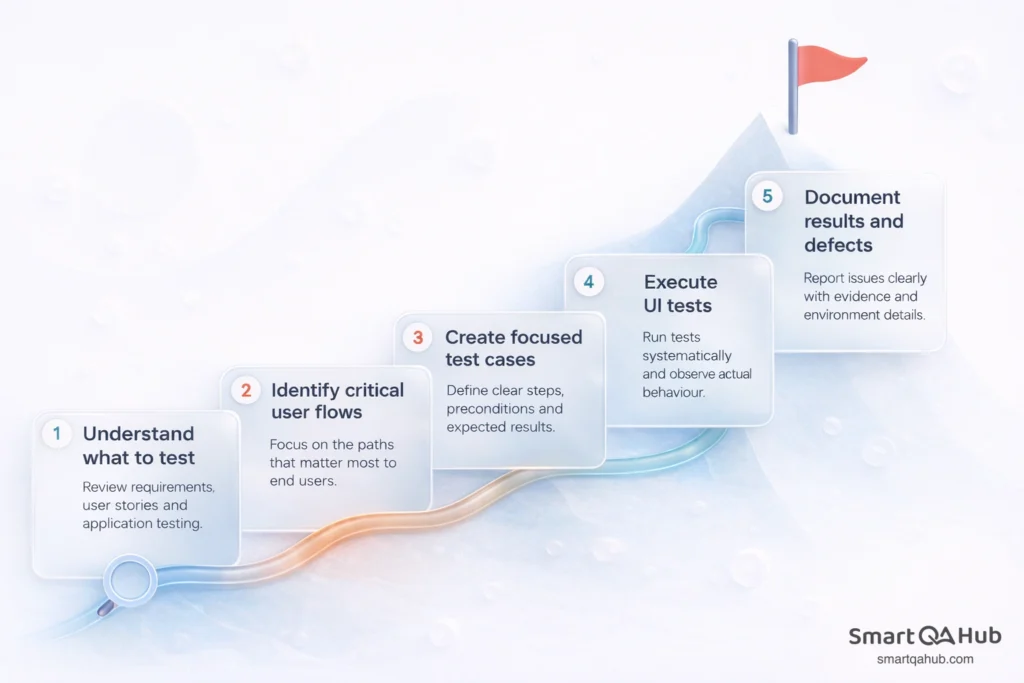
Before you click anything, you need to understand what you’re testing and why. Start by reviewing any available documentation: requirements, user stories, design mockups, or acceptance criteria. What is this feature supposed to do? Who will use it? What’s the expected behavior?
If documentation is sparse (welcome to real-world testing), explore the application yourself. Click around. Try different paths. Build a mental model of how things work. Talk to developers or product managers if you have questions.
Identify the critical user flows – the paths through the application that matter most. For an e-commerce site, that might be: search for product → view product → add to cart → checkout → payment. For a banking app: login → view balance → transfer funds. These high-priority flows deserve the most testing attention.
Creating your test cases
A test case is simply a set of steps to verify specific functionality. Good UI test cases share several qualities:
- They’re specific – not “test the login” but “verify that entering valid credentials and clicking Login navigates to the dashboard.”
- They’re repeatable – another tester following your steps should get the same results.
- They include expected results – what should happen if the test passes?
- They consider preconditions – what needs to be true before the test starts? (User account exists, user is logged out, etc.)
For each test case, document:
- What you’re testing (the feature or element)
- Preconditions (starting state)
- Steps to execute (specific actions)
- Expected result (what success looks like)
Keep your test cases focused. One test case should verify one thing. If you’re testing login, create separate test cases for valid credentials, invalid credentials, empty fields, and locked accounts – not one massive test that tries to cover everything.
Executing and documenting results
When you run your tests, be systematic. Follow the steps exactly as written. Note what actually happens versus what should happen. Take screenshots or recordings when you find issues – visual evidence makes defect reports much more useful.
When something fails, don’t just write “it didn’t work.” Effective defect reports include:
- Clear title describing the issue
- Steps to reproduce the problem
- Expected behavior vs. actual behavior
- Environment details (browser, device, OS)
- Screenshots or videos
- Severity assessment (how badly does this affect users?)
Good documentation helps developers fix issues faster. It also creates a record of what was tested, which matters when you need to show test coverage or retest after fixes.
Common UI testing mistakes and how to avoid them
Every tester makes mistakes early in their career. Here are the ones that catch beginners most often – and how to avoid them.
Testing only the “happy path”
The happy path is what happens when everything goes right. The user enters valid data, clicks the right buttons, and follows the expected flow. Many beginners test only this path and miss the errors that occur when users do something unexpected.
Real users make mistakes. They enter invalid data. They click buttons multiple times. They navigate away mid-process and come back. They use the back button when you don’t expect them to. Effective UI testing explores these edge cases and error scenarios, not just the smooth path.
Ask yourself: what happens if a user does something wrong here? What if they leave a required field empty? What if they enter text in a number field? What if their session times out? Test those scenarios too.
Ignoring different screen sizes and browsers
It’s tempting to test only in your preferred browser on your own screen. But users access applications from everywhere. A layout that looks perfect on your desktop might be broken on mobile. A feature that works in Chrome might fail in Safari.
Make cross-browser and cross-device testing a standard part of your process, not an afterthought. At minimum, test in the most common browsers your users actually use. Check how the interface responds on smaller screens.
Not testing actual user workflows end-to-end
Testing individual elements in isolation isn’t enough. Users don’t interact with buttons in isolation – they complete workflows. They search, browse, select, purchase. They register, configure, use.
Test complete user journeys from start to finish. Verify that a user can actually accomplish their goal, not just that individual pieces work. Sometimes elements work perfectly on their own but fail when combined in a real workflow.
Over-relying on automation before understanding manual testing
Automation is powerful, but it’s not magic. Beginners sometimes rush to automate tests before they understand what they’re testing or why. The result? Automated tests that check the wrong things, miss important scenarios, or break constantly because they weren’t designed well.
Build your manual testing skills first. Understand how to design good test cases, think critically about coverage, and identify what matters. Then, when you automate, you’ll create tests that actually add value.
Skipping accessibility checks
Accessibility isn’t optional – it’s about ensuring all users can interact with your application, including those with disabilities. Screen readers need to navigate your interface. Keyboard-only users need to access all functionality. Color-blind users need sufficient contrast.
Include basic accessibility checks in your UI testing: Can you navigate using only the keyboard? Do images have alt text? Is there sufficient color contrast? Does the interface work with screen readers? These checks benefit all users, not just those with disabilities.
Pro tip: Before you finish any UI test, ask yourself: “What would happen if a real user did something unexpected here?”
UI testing terminology
DOM (Document Object Model) – The structure that represents a web page’s content. UI testing tools interact with elements through the DOM.
Element locators – Methods for identifying specific UI elements (by ID, class, name, XPath, CSS selector). You’ll use these extensively when writing automated tests.
Test scripts – Code that automates test execution. Scripts simulate user actions and verify expected results.
Regression testing – Retesting existing functionality after changes to ensure nothing broke. A primary use case for automated UI testing.
Tools and resources
Where to learn more:
- ISTQB Foundation Level syllabus covers testing fundamentals
- Tool-specific documentation (Selenium, Cypress, Playwright all have excellent learning resources)
- Ministry of Testing community and courses
- Test Automation University (free courses from Applitools)
FAQ: Frequently asked questions about UI testing
Do I need to know coding to do UI testing?
How is UI testing different from functional testing?
When should I start automating UI software tests?
Put your knowledge into action
UI testing ensures that users can actually interact with your application the way they need to. It bridges the gap between working code and working products – because software that users can’t use effectively isn’t really working at all.
The key takeaway? Start by understanding what users need to accomplish, then systematically verify that the interface supports them. Combine functional checks, visual verification, usability thinking, and cross-environment testing for thorough coverage. Build strong manual testing skills first, then add automation where it provides value.
Your next step: pick an application you use regularly – any web or mobile app – and test its UI with fresh eyes. Try the approaches we’ve covered. Find a form and test what happens with invalid input. Check how the interface looks on different screen sizes. Think about what a first-time user would experience. That hands-on practice is where real learning happens.


